

Buy ProductsDistributors     |
Maker Faire 2014 and RGB ShadesKickstarter for RGB Shades: https://www.kickstarter.com/projects/macetech/rgb-led-shades
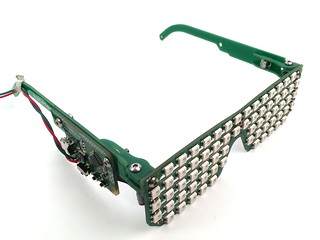
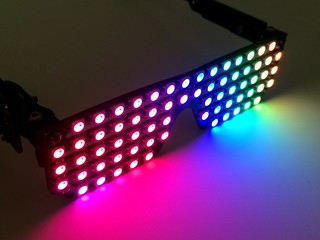
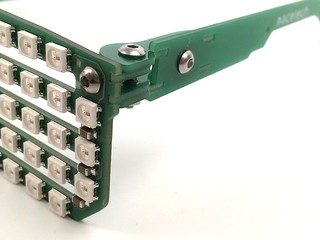
The big event of the maker movement, O’Reilly Bowl *cough* I mean Maker Faire Bay Area 2014, happened last weekend (May 17th and 18th). As with most words used to describe Maker Faire, “happened” is a little insufficient. It’s a tremendous and complicated event that requires a massive effort from everyone involved…the O’Reilly Maker Faire team, the Maker Shed, the sponsors, the performers, the speakers, the exhibitors, and the event staff. And one more group that I didn’t fully appreciate until this year…the attendees (let’s call them participants). This was the first year at Maker Faire Bay Area that I was not an exhibitor, and instead wandered the exhibits and crowds. It was amazing and exhausting, just as much as if I’d been running an exhibit table. Part of that might have been because I was a walking exhibit of sorts. Last year at Maker Faire we launched our single-color LED Matrix Shades, which were incredibly popular and sold out of our stock within a couple days. Since then we’ve been working on better assembly processes and sources, and These are based on the popular WS2812B pixels, resulting in a bit chunkier appearance but very bright, vibrant colors. In fact, if run at full brightness these would get uncomfortably warm and require 13 watts, not to mention completely blinding to anyone except the wearer. We want them to run from a USB battery pack, so we set them at 1/5th maximum brightness, and they still verge on annoyingly bright.
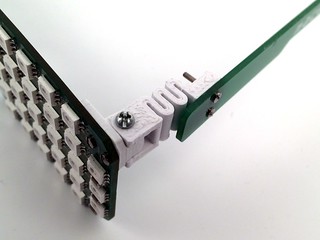
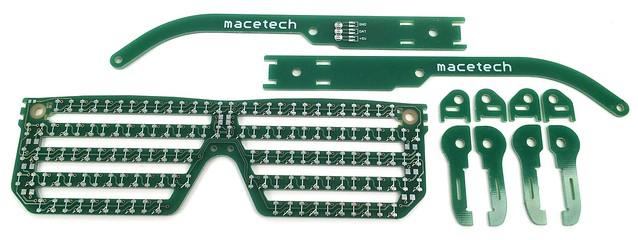
The best part of this new design, in my opinion, is new hinge method. In the past, we’ve used 3D printed parts to make prototype and low-volume production parts for LED Shades hinges. This works fine, but is fairly slow and requires some amount of post processing of the parts. The screws required are also very small and difficult to install. On this design, I decided to use PCB milling capabilities as a source of production-quality CNC milled parts.
The design process iterated between Eagle CAD and Autodesk Inventor. I wanted to make sure that all the shapes used were easily created in Eagle, so I would start there for any design changes. Then I’d edit the corresponding 3D model in Inventor, and test it in an assembly. I was able to test fit the parts and create working physical models that helped catch a few clearance problems. It was very helpful that McMaster-Carr has 3D models available of nearly every fastener they sell…I was able to just drop them into the assembly. The sort of milling features specified here are very tiny and require a lot more accuracy than most PCB fabs are willing to promise. I had 0.6mm drills in the corners of the rectangular cutouts in order to clear the corners, and then a milling outline designed for a 1.0mm diameter slotting bit. It might have worked just leaving the inside corners rounded, but I wanted the clamping force spread over a flat surface rather than concentrated into corners and edges of PCB material; I feel that would eventually wear out and loosen. I was able to get the PCB fab to agree to mill those features very carefully, and I am extremely pleased with the fit. The hinges are very strong and give me a lot more ideas for using FR4 as structural or mechanical components.
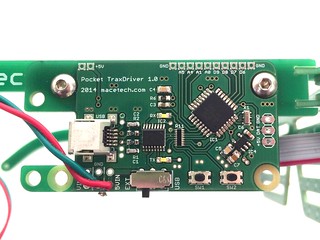
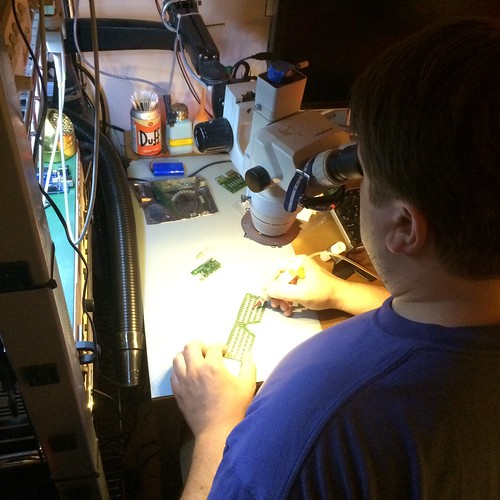
The design was finished with only a couple weeks to spare before Maker Faire, and the parts would take a while to arrive. It was risky, but everything did make it just in time…however, not with enough time to build the first RGB Shades prototype before getting on the plane to San Francisco! A friend offered the use of his electronics lab, and even helped with soldering, rework, and testing. Plus some excellent Thai food…it was a full-service electronics prototyping spa. The RGB Shades and controller board worked on the first try, no smoke in this smoke test!
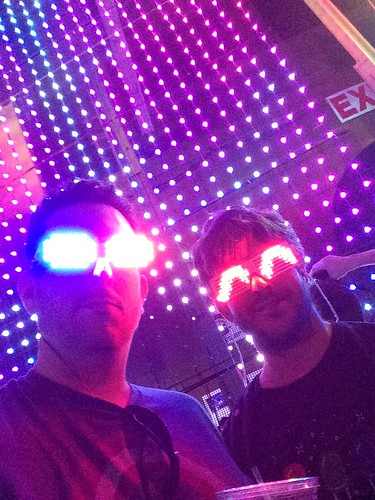
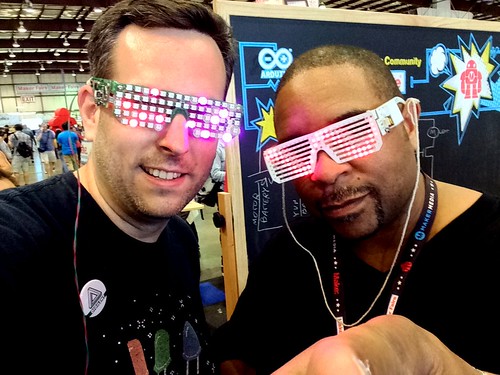
Saturday arrived, it was beautiful weather, and Maker Faire was PACKED. A lot of new exhibitors this year, many of them kids. I talked to a few who said their parents brought them a few years ago, and they got so interested in making things that they eventually ended up showing off their own creations at Maker Faire. Hey, Dale Dougherty, it worked! I don’t have that many photos of the actual Faire…partly because I wanted to experience everything rather than try to prove it to someone else. But mostly because I was wearing the RGB Shades and kept getting stopped to answer questions and participate in some awesome selfies. That’s Sir Mix-a-lot…really.
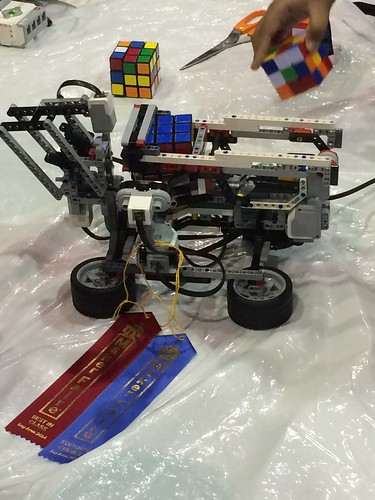
I really liked this Rubix Cube solver. I think there have been Rubix Cube solvers at every Maker Faire, but this one was just satisfying to watch, and constructed by a kid from his Lego set.
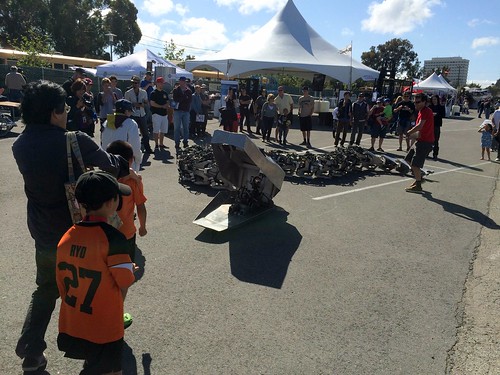
The Titanoboa is rather impressive, and was in full working order this weekend. Slithering dangerously as only a multi-ton robotic snake can.
One highlight of my experience was the aerial drone free-for-all battle. There was a netted area where battles were taking place all event, but the last battle they just threw all the survivors into the ring. It was hilariously amazing and potentially dangerous, and went on long enough to draw a huge crowd. Because why not smash together a bunch of finely-tuned expensive devices? It can’t compete with Robogames for pure carnage, but definitely adds another dimension to the concept. The wrap-up of Maker Faire was Jeri’s hack dinner. It’s usually held at Harry’s Hofbrau next to the Crowne Plaza in Foster City, but that location closed (to the vocal relief of more than a few). Instead, it was at BJ’s Brewhouse. They were warned ahead of time, but still were completely unprepared for half their restaurant to be taken over by a crowd of strange people waving unrecognizable devices. By the time I had to leave, I’d seen someone climb on a table attempting to hook a string of LEDs to the exposed low-voltage downlighting, and a hacked automatic air freshener randomly belching out a two-foot flame. It was great to see all my maker friends and colleagues again, and hopefully will find a way to set up a booth next year. But there’s still Maker Faire New York, Detroit, and others…maybe we’ll see you there!
Submitted by Garrett on Mon, 05/26/2014 - 14:53. |
Cool Links 
Recent Comments
|

Hi Garrett, Twas great to
Hi Garrett,
Twas great to see you again, and your PCB hinges were one of the highlights for me. Beautifully executed.
Whenever you are in town, my lab is always available to you, 24/7.
Cheers mate,
Philip
are these neopixels by
are these neopixels by adafruit?
Are these RGB Shades going
Are these RGB Shades going to be going up for sale too? Or just more Matrix Shades? Both are fantastic, just curious.
The RGB shades Garrett was
The RGB shades Garrett was wearing at the Faire are the first prototypes. We are trying to get a quote together to produce them so we can sell them on the store. I hate giving estimates, as something seems to always get in the way. But hopefully in a couple months...
It would be amazing to see a
It would be amazing to see a hobby kit like this. *hint hint*
Nice soldering setup -
Nice soldering setup - what's the microscope thingy?
It's a really good binocular
It's a really good binocular microscope with illumination...it's my friend's setup so I'm not sure exactly which one. Magnification gives your hands super precision powers because there's a visual feedback loop to your finger control system.
WHen you're going to sell
WHen you're going to sell those, will you also sell the pure PCB? or publish the gerbers? I like assembling stuff myself^^